Wednesday 30 March 2011

New tool


I finally got myself a real leather punch and I'm pretty pleased with it as it looks good, I believe. Simple, sleek, just the way I like it. Unfortunately, I won't be able to put it through the test any time soon. We've decided to move - No panic! We stay in Paris! As a matter of fact we even stay on the same block - just a different apartment, slightly bigger. But this means a lot of work in the weeks to come (we'll be moving the second week of April, most likely).  No time for new tutorials, I'm afraid, but I intend to keep posting here. Pictures of things going on and - who knows - a little craft or so, whipped together in the wee hours, and a story or two...


PS: Cindy has a dog - I have a bird, don't you think?! It makes me think a bit of Mo Willems' pigeon. And talking about pigeons - I had a very bad encounter with a pigeon yesterday, or worse, with its droppings... I'll spare you the gross details, as gross it was...   That too is Paris...


Friday 25 March 2011

A new prototype

green leather purse

Don't you remember those little coin purses worn around the neck, back in the seventies I guess it was. Everyone in class had one of those. We wore them on school field trips with the coin which mom gave us in the morning to buy a drink or a little souvenir with, safely tucked inside, or as an accessory on other days on top of one of those tight turtle necks and with flared jeans and clogs underneath, or with a smocked dress. They disappeared, probably because they weren't that safe after all but I still remember mine. I got it when on vacation in Spain. Our first time in the South. It'd been on my wish list for a while and I wouldn't leave Spain without getting one of those! I no longer have it but I remember exactly the way it looked.

Anyway, as I wanted to experiment with rivets and snap closures I decided to make one of those coin purses. My choice of leather wasn't ideal as it was slightly too heavy for my paper punch - so maybe it is my tool kit which isn't adequate? I might want to invest in one of those real leather punches, for one thing.
I suffered quite a bit before I had the snaps and rivets into place and then my sewing machine refused so I had to work it manually to get the needle through the leather - but I like the result and so do my girls...

Little by little I'm adding to my leather working skills. Hopefully it will get me far enough to, one day, tackle that beautiful skin I got a while ago... I'd love to make a purse or tote of some sort.
We'll see - let's not rush into things!

Thursday 24 March 2011

A waste of time

spring in the city


I feel so frustrated - my hotmail account has been hacked apparently and I'm completely stuck.
Windows Live Support isn't very supportive, you see... I guess, I'll have to be patient.
Luckily, I was able to recover my contacts list as I just installed Outlook on my new laptop, the other day (I'm not to crazy about Outlook - but at least it was helpful in retrieving my contacts). So now, I can start ticking off the list and letting people know to contact me via an alternative e-mail address - a good moment for a much needed Spring cleaning in my contacts folder...
And all this while we have the most gorgeous weather - I'd rather be outside right now...

Tuesday 22 March 2011

Coin purse, revisited

Mini drawstring purse


The same little coin purse, a tiny bit different...
Made it in no time after spotting this (through this post at Blue Moss)...
The shoe lace, charms and jewels, I recycled from this project (I no longer have the phone...).

It's tiny as I used the wrong plate, but definitely cute and more jewelry like, I guess - it fits a couple of coins only. Enough for ice cream on the beach, though...

Thursday 17 March 2011

Fabric and wire flowers :: a tutorial

Fabric and wire flower


Though this morning didn't feel like Spring - I was cold the entire trip to school and still am, despite the polar fleece I'm wearing now and the cup of hot coffee I had - we certainly were lucky with the weather lately. Sun! I just love the light the early Spring sun brings! It makes me happy, excited. And it shows in my projects, I believe. Take this fabric and wire flower, for instance. Don't you think it's over the (my) top colorwise?!

It started with one of those kits to make flowers with wire and some colored gooey liquid (I actually think it's white glue mixed with colorants of some sort) which little H. received from a friend for her birthday. While I was helping her out I just started wondering if  maybe I could do something similar with fabric and wire. With Vliesofix that shouldn't be too difficult, I figured - no, I'm not affiliated with Vliesofix, but just happen to have bought a lot of the stuff. So, after buying the Petit Pan scrap bag, everything came together and I made my flower. You've no idea how little time these flowers take to make. It's free style from beginning till end, which I love. I don't like wasting precious time on making patterns, and elaborate preparations before being able to actually do something. In that respect I'm not any different from the average kid - I want instant gratification... (when little H. read on the box she had to wait for at least 12 hours for the gooey stuff to dry and set, she was really disappointed "but it looks dry to me - do I really have to wait untill tomorrow, mommy?").

So, if you want to give that Spring feeling a boost or just want to hold on to that last bit of summer, just keep on reading as here are some instructions!


What you'll need:

- scraps of fabric
- wire, not too thick
- Vliesofix, Bondaweb, ...
- scissors or cutting pliers
- iron

Fabric and wire flowers


Instructions

  1. Determine how many flower petals you want. Cut your petals, freestyle, in pairs,  i.e. cut at once front and back of the same petal by layering your fabric such that wrong sides are facing. Repeat  until you have the desired number of petals.
  2. Trace every pair of petals onto the paper backing of the Vliesofix and cut out.
  3. Cut wire to length - you'll need one piece of wire per petal. Bend and twist the wire to form a petal shape, using the fabric petals as a guide for size - make the wire petal slightly smaller than the fabric petal.
  4. Iron Vliesofix onto the wrong side of its corresponding petal. Let cool down. Peel off the paper backing. Position the wire petal shape on top. Next, place the other petal piece on top, sandwiching the wire in between petal layers. Fuse the petal layers and wire together with your iron. Let cool down. Repeat for every set.
  5. Arrange your petals to form a flower. When happy, twist the wires together to form a stem. Note: depending on the gauge of the wire you're using and on what you intend to use the flower for, you might want to twist the wire around a stick or another more heavy wire for support.
  6. Once you're done twisting you can start playing with the petals - the most fun part, I think - to shape your flower.
Make a couple and put them in a vase, or twist them together to form a garland. Use them to decorate the dinner table for a festive meal. You could also make colorful napkin rings with these. So many possibilities and yet so simple to make!

Enjoy!

After I made this flower, I found  a similar project in the last issue of Marie Claire Idées. Instead of Vliesofix they use glue, which is slightly more messy, if you ask me...

fabric and wire flower


Please note, these tutorials are intended for personal use only. Therefore, do not reproduce, sell or commercialize in any form without permission. Thanks for understanding!

If you made something using a tutorial found on this blog or if you got inspired by something you found here, make sure to post your pictures here.


Wednesday 16 March 2011

SOS Japan Sale - Hurry up!

SOS Japan

Oatmeal colored linen, a leather rising sun, and a very nice tomato red and white narrow chalk line cotton make this a very stylish shopping bag - the perfect accessory for summer. It's now available in my Etsy shop.

100% of this sale will go to the Red Cross Japanese Disaster Relief Fund.
Shipping is free.

Dimensions:
H: 31cm without handles - 59cm with handles included
W: 43cm

Small pocket on the inside.

Hurry up - there's only one available!  Update: the bag has found a new owner! Thank you for your generosity, Lauren!

PS: I considered the option of keeping an auction as suggested by some of you in the comments on my previous post - an idea I liked a lot - however, there were quite a few practical issues which made me decide to just go ahead and sell through Etsy. But, many thanks for the suggestions made!

Tuesday 15 March 2011

SOS Japan

SOS Japan


Earthquake - tsunami - nuclear disaster threat...
Impossible to imagine what people are going through right now in Japan.
I just had the feeling I had to do something - how little it is.

This afternoon I whipped together this bag which will be up for sale later this week. I haven't worked out the details yet - but most likely it will go through my Etsy shop.
The full amount of the sale will be donated to the Red Cross Japanese Disaster Relief Fund (through La Croix Rouge Française).

Saturday 12 March 2011

Button up for Spring! # 2


I may have sounded a bit too enthusiastic when I announced there would be a second part to the 
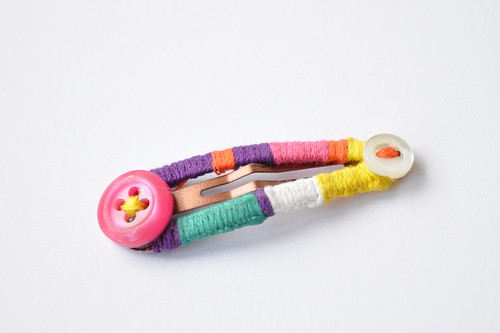
Button Up for Spring from last post. So, let's hope you're not too disappointed. It's just what is: another set of hair accessories for my poor girls, whose mom can't do more than make a pony tail or two, or a braid if she's in a good mood, ... LOL
Blame it to my own miserable hair and the fact I never ever had long hair as a child just because of that reason. In those days it was widely believed that keeping hair short would make it stronger and thicker in the end, just like covering it in egg, while shampooing, would make it stronger, as would rinsing it with beer and shampoo it again - I can tell you: these remedies don't work, my hair's still miserable, but no longer short!

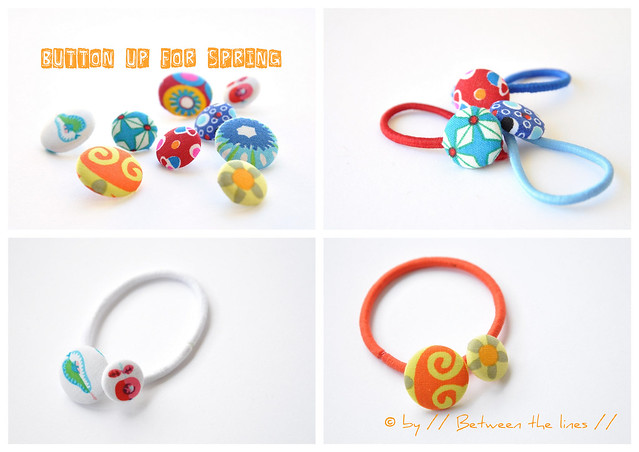
Anyway, when I made these fabric covered buttons, all I could come up with to attach them too was elastic hairbands. Because you see, I 
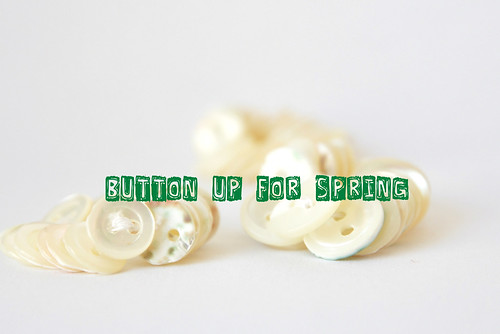
had to make my own fabric covered buttons. You see them showing up everywhere and I just had to try it! And they're fun to make!

I bought two kits for covering buttons - I bought the first one a while back but forgot about it and then I had already bought a second one when the first one showed up again in one of my many not so well organized boxes. Good thing (or is it a bad thing - I guess it doesn't really matter) they were of a different size. Anyway!
Last week, I also bought a bag or two of Petit Pan fabric scraps. All excuses are good. Here's mine: I like their designs, I just have a little trouble with color in my own projects. Colors intimidate me. I like colors and colorful fabric, but it also scares me. I can't deal with it, it seems like, too afraid to overdo things, to create chaos or to waste my pretty fabric. The advantage of working with scraps, however, is that with little pieces you can add a little touch of color here and there without it becoming too overwhelming (for me). And I like buying scraps because of the surprise aspect too - it's like unwrapping a present. So, now you know everything!

And how did I make the hair accessories?
It's very simple: First, start by  covering your buttons, however, keeping in mind:

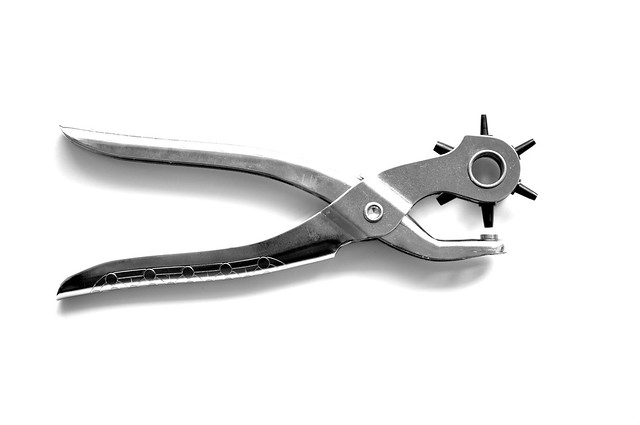
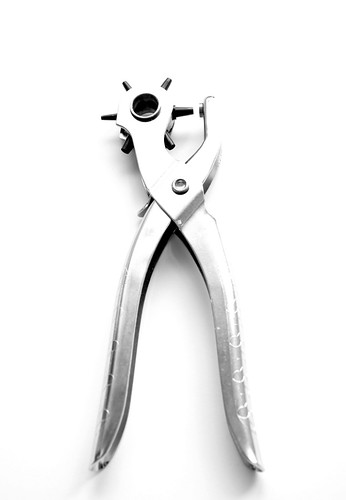
1. to cut your fabric big enough otherwise it will stick out on the sides - I know this because I made that mistake twice (!). Luckily, I managed to open up the button again, bend the metal to its initial form with my mini pliers, after witch I started all over again with a bigger piece of fabric - too bad for that nice little detail that went lost...

2. when using a print where orientation matters, make sure to attach the plastic backing such way that the print points the right way (my apples and pears buttons have a slight twist...)

After covering your buttons, attach them to the elastic hairbands.
How? By sewing them on, of course! I wasn't that smart at first. For the single buttoned elastics, I cut open the elastic (!) and had the hardest time to slide the button on, after which I had to make an ugly knot in the elastic, which the button barely covers - it took me three buttons and a night of sleep to realize my stupidity, go figure! I guess I should stop doing this kind of things after midnight...

Well, that's a long post for just a set of simple hairbands! I hope you didn't mind...

Wishing you a great weekend!

xo, P.

Thursday 10 March 2011

Button up for Spring! # 1


A couple of weeks ago, we had another one of those brocante sales in our neighborhood. I didn't find any Eames chairs this time, unfortunately, but I didn't return home empty handed. I bought the cutest, teeny tiny mother of pearl buttons! I love mother of pearl buttons and buttons in general, though I must immediately add that I don't like making button holes very much, especially not if there are a whole bunch of them as on a shirt.
But who needs button holes anyway, if you can add buttons just like that as a little detail...


My mother of pearl buttons haven't been out of sight really since I bought them - I picked them up from time to time, thinking about the different ways I could use them. Michelle's bobby pins certainly were an inspiration.

So, here are a couple of the button ideas, I came up with so far. All very simple and involving very little supplies: fabric scraps, embroidery floss, elastic hair bands, hair clips, bobby pins, needle, glue and scissors...


Bracelet:

This is my favorite in the lot. Cut a piece of fabric, about 2cm wide and long enough to go around your wrist. Fold in the same the way you would do for making biais tape and sew closed with a whip stitch, if you like. Wind embroidery floss around it in different colors.
Sew on a couple of buttons - and there you have another bracelet...
As easy as 1,2,3 - perfect for the kids to make on a rainy Wednesday afternoon (leave out the whip stitch in that case).


Bobby pin:

Cut of a strand of embroidery floss and tie it at one end of the bobby pin. Start winding the floss around the bobby pin (winding over the loose end to secure, if you like, which I didn't). Change colors as you go. Make a knot when finished with one color and with a needle thread the loose end under the embroidery floss covered part. Next, sew on a couple of buttons, using different colors of floss. Finally, apply a tiny droplet of glue to all knots and loose ends, and to back of the buttons, to secure. Done!


Hair clip:

Proceed in pretty much the same way as for the bobby pin - however, instead of winding the floss around the clip, use a blanket stitch. If you can't sew on the buttons, glue them on (the use of a hot glue is recommended here, as one of my buttons fell of with regular crafts glue).

This is as fancy as it gets when it comes to hair styles and accessories at our place. I have no talent or what so ever when it comes to styling hair. I'm afraid I'll have to disappoint my sweet girl M. as I really don't see how I could make her hair look like this hairstyle she'd spotted on One Pretty Thing... I wonder if a green and white hair clip would do?

Make sure to come back tomorrow, as I have a more buttons up my sleeve...