Saturday 28 May 2011

Celebration

leather flower pendant


Everyone's back home and it feels good.
I picked up little H. from the train last night. She's had a great time so much I could tell from the sound of her voice or better from the lack thereof. Coarse from all the singing at the 'boum' the night before. She was cheerful and had lots to tell on our metro ride home. New songs to sing, new clapping games to share. Big Sister was greeted with a bear hug - she even got her big sister the coolest present ever - something 'you won't find in Paris'. And then late last night Daddy got home from his trip - no coarse voice as he didn't have a 'boum' the last evening of the conference, but tired nevertheless after a week of hard working.

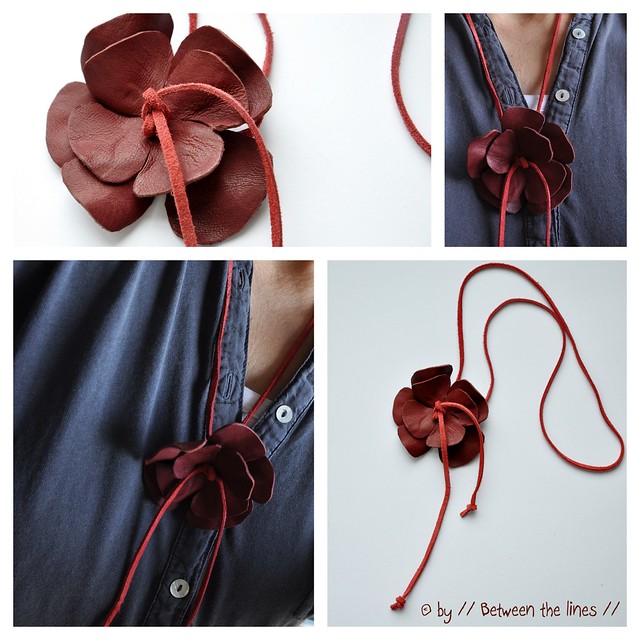
With everyone back home, my creativity returned as well. This flower necklace is something new I have been working on. I really like it and I'm contemplating making a few for the shop.

A flower to celebrate...

Wishing you a happy weekend too,

xo, P.

Thursday 26 May 2011

Lotus :: ctd

Lotus


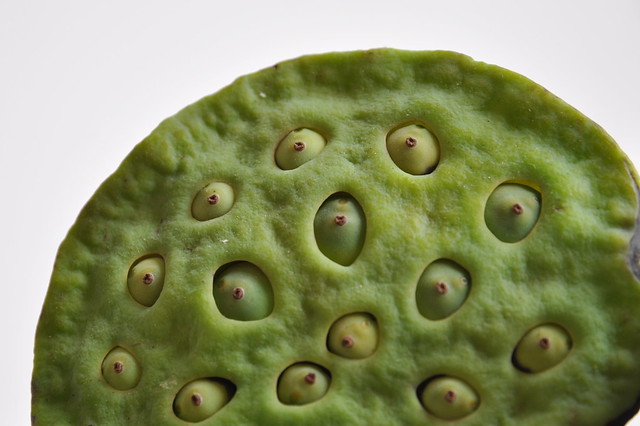
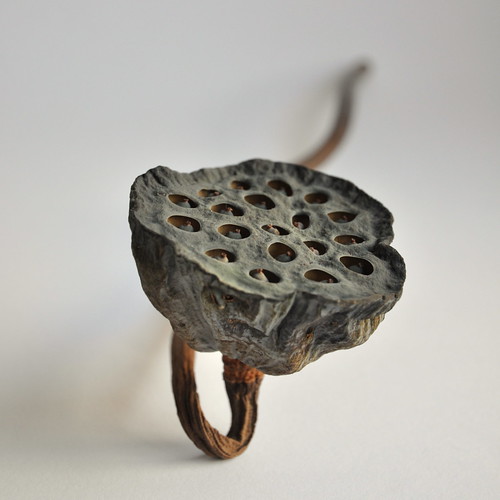
Remember the lotus seed pods from a while back?
That's what they look like now.
I can't tell which version I prefer, but there's certainly something about them right now...

Old and crumpled, a bit stubborn but proud.

I hope I can grow old like that...

Tuesday 24 May 2011

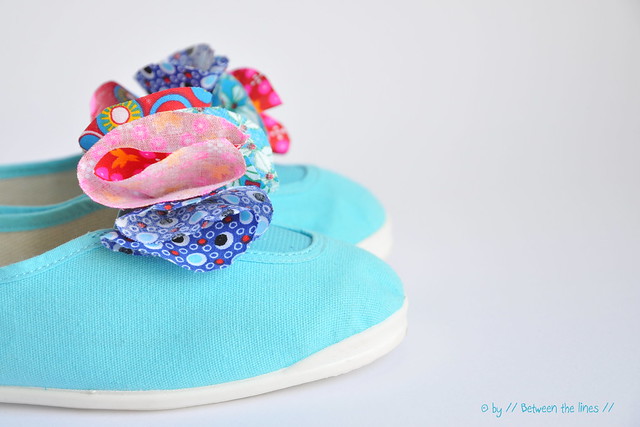
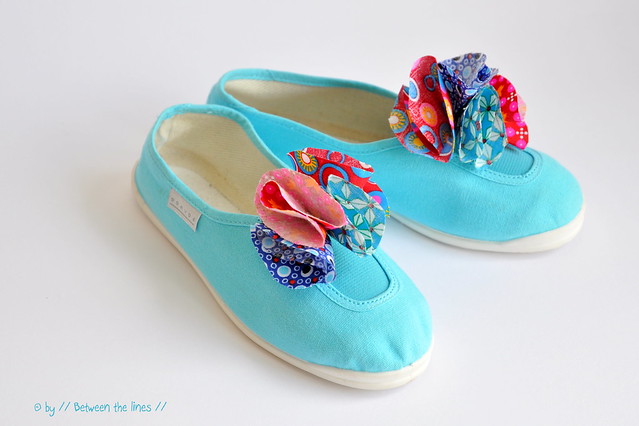
Flower petal shoes :: the kids version

Kids flower petal shoes :: DIY


It's like the past couple of weeks all I've been doing is packing and unpacking. First for the move. Then big girl M. left on a trip with school (which was great, by the way!). Yesterday little H. left with her class for a trip until the end of the week. And today, before dawn, K. set off on a business trip.

Packing. Unpacking.
Boxes. Suitcases. Backpacks.
Packing. Unpacking.

Result: I'm way behind on blog reading and I have been kind of absent here, too. But, I'm working on it as of today!

Kids flower petal shoes :: DIY

So, to start with, here is the kids version of last weeks up-cycled espadrilles. This pair of (really cheap) gym shoes (which they needed for the trip) went in little H.'s suitcase as a little surprise (it became sort of a habit here - we stick little surprises in suitcases whenever someone goes on a trip). All I did, was cut some petals out of the Petit Pan fabric scraps I bought a while ago. I used four petals per flower. Folded and layered them and next, sewed them together, as explained here.
Simple and easy - so, easy a kid could do this as no special sewing skills are required. Perfect as a birthday party craft, if you ask me.

I absolutely like the result and they're SO much little H.
I'm pretty confident she loved them when she unpacked her suitcase!

Kids flower petal shoes :: DIY

Wednesday 18 May 2011

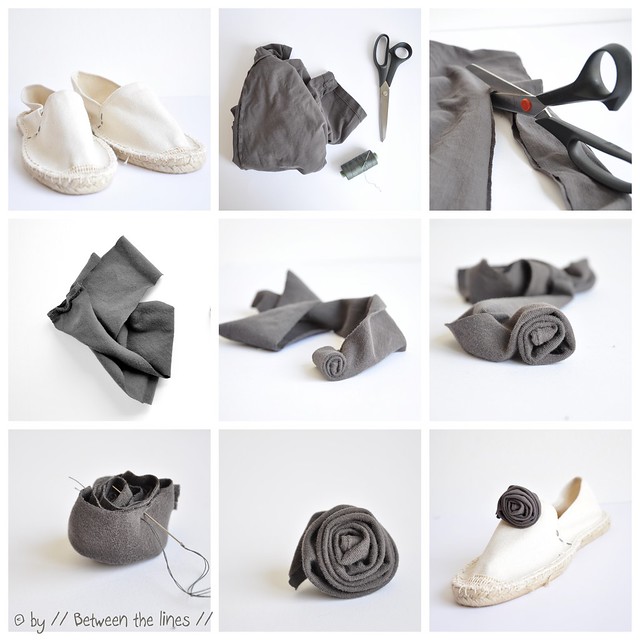
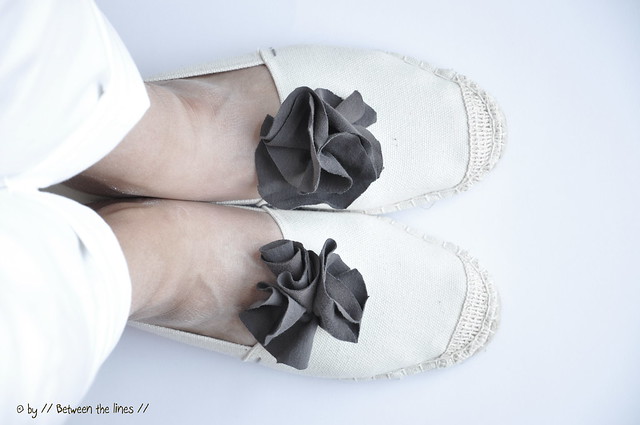
Creative with espadrilles :: a DIY

Creative with espadrilles :: a DIY

I have this love hate relationship with espadrilles. I always loved them because they stand for summer. Whenever they show up you know summer's around the corner. Summer. Sun. The beach. No stress. I also love them because of their simplicity. A shoe can't get any simpler (nor cheaper) than that, can it? A sole and two pieces of fabric joined together.

However, I didn't wear espadrilles for the longest time because of the squeaky sound the rope of my last pair made. Just thinking of it gives me the shivers! So, what made me buy another pair and devote a whole post to them? To be honest I have no idea - I must admit I fell for the gray stitches on the sides, but was that enough to buy them, bearing the squeaky sound of the rope in mind? I guess I just needed another challenge: the espadrille make-over.

I actually had a lot of fun working on this DIY. As a matter of fact, what you see here is only a fraction of the things I came up with. There might be a couple more ideas in the pipeline...
Anyway, let's just start with this handful of ideas. Ready?

What you'll need:

- a pair of espadrilles
- an old T-shirt or other fabric scraps, if you like
- a pair of scissors
- needle and thread

Instructions:

Bow-tie espadrilles

Creative with espadrilles :: a DIY

1. Cut a strip from the old T-shirt, about 3-4cm wide and 20cm long.

2. Fold over the strip so the fabric overlaps. With needle and thread, in the middle, gather and secure the fabric. Cut of excess fabric, if any.

3. Fold a small piece of fabric over the stitches, to hide, and secure with a few stitches on the back. Shape the bow tie.

4. Position the bow-tie onto the espadrille and secure with a couple of stitches.

5. Repeat for the other shoe. Wear!


Rose bud espadrilles

Creative with espadrilles :: a DIY

1. Cut a strip of t-shirt.

2. Fold in half and start rolling the fabric to form a rose.

3. Secure at the bottom of the flower with a couple of stitches. Shape.

4. Position onto the shoe. Sew into place with a couple of stitches.

Note: the size of the flower depends on the width and length of the fabric. You can play around with both. Or why not make several flowers different in size and color to form a rose garden on your shoe!


Flower petals espadrille


Creative with espadrilles :: a DIY

1. Cut three (or more) not so round circles of roughly the same size.

2. Fold them in half and again in half and place all three on top of each other. Pin together.

3. Next, sew them together with a couple of stitches and shape the flower as you go.

4. Place on top of your shoe. Sew into place with a couple of stitches.

Note: Same thing applies here: play with size and color or combine several to form a flower patch on your shoe. Add sequins, beads, leaves, ... if you wish so, or just keep it simple.

Creative with espadrilles :: a  DIY 

This is a fairly easy craft, which kids could easily do. It's not very time consuming, no special supplies are required and the reward is immediate.
Maybe a fun craft idea for a summer birthday party!? If you can't find espadrilles right away, gym shoes might work just as well, just as any other ballerina or pair of flats.

My espadrilles have been extensively tested by now. And you know what? This pair doesn't squeak!

Creative with espadrilles :: a DIY

Please note, this tutorial is intended for personal use only. Therefore, do not reproduce, sell or commercialize in any form. Thanks for understanding!

If you made something using a tutorial found on this blog or if you got inspired by something you found here, make sure to post your pictures here.

Monday 16 May 2011

Gone


M. left on  a school trip this morning, with her class.
We slipped a couple of goodies in her bag. Little H. wrote 5 letters, one for each day and made her a lovely beaded bracelet (which she hid in the Wednesday envelope) and I assembled a pair of earrings, matching the party dress we bought for the "boum" on the last evening of camp...(Don't you like that fabric?!)

I'm sure they'll have lots of fun and they'll come home all grown up again...

See you on Friday, Sweetie! Have a great time!

PS: I'm glad I'm able to post again after Blogger had the hiccups all weekend - I haven't recovered all of your comments on the previous post yet, but according to Blogger they too should re-appear soon.

Wednesday 11 May 2011

A splash of color

colorful beaded necklace


I made this necklace last weekend, with bits and pieces I still had lying around from other jewelry projects - odd pieces of brass chain, gemstones (most of which I forgot the names), liquid silver and glass seed beads, which I love. I used brass eye pins in between. You can't tell from the pictures, but I messed up some of the eye loops - I guess I got out of the habit and I didn't have enough eye pins to start them all over again...
But I do like the result.

I have been wearing my new accessory every single day. It adds a little splash of color to my predominantly gray/beige/white (and very boring) wardrobe.
That and my bohemian style belt which has become another favorite of mine...

colorful beaded necklace

colorful beaded necklace

colorful beaded necklace

colorful beaded necklace

Tuesday 10 May 2011

Lotus seed pods

Lotus


Lotus


Lotus


Lotus


Lotus

I bought these lotus seed pods earlier today as a reward for a day of hard working. It wasn't until I put them in a vase that I realized the incredibly photogenic nature of these pods. There wasn't time for an extensive photo shoot, but I do like my snap shots.

I hope I'll find a little bit more time though, this week, to take pictures of small projects I've been working on.
But first I need to make sure big girl M. has everything ready for her upcoming school trip...

Wishing you a great and productive week,

xo, P.

Sunday 8 May 2011

Happy Mother's Day


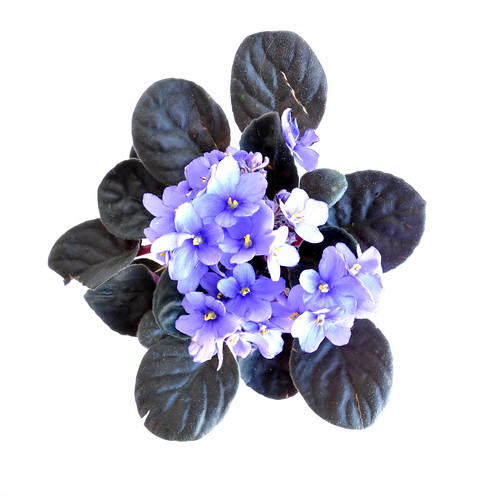
I had an early Mother's Day gift this year. Big girl M. bought me some flowers this week - not one bouquet, but two and these little violets. She surprised me when I got home after dropping off her little sister at gym. She'd put them in vases around the house. One bouquet of lovely scented yellow freesia's and one bouquet with freesia, muguets and roses. 

The best present however was the smile on her face, the sparkle in her eyes, the excitement and her story of how she planned everything. Too sweet for words...
Thank you my dearest little M. for this early, lovely surprise!

I'm wishing a happy Mother's Day to all of you moms, wherever you live...! May you have a great day!

xo,
P.

Thursday 5 May 2011

It starts feeling like home

Starts to feel like home...


Three weeks, that's how long we've been here, in the new apartment. With all the boxes unpacked (there are a few exceptions, still), it starts to feel like home. And the four of us have a general good feeling about the new place. We like how it is roomier. We love the abundance of light. We love having quiet neighbors. We love seeing people walk down the street. We love being closer to the shops.

A lot remains to be done still - but we prefer to take it slowly. We've got nothing on the walls for instance, because we like our clean bare walls for one thing and because we want to make the right decision before drilling that hole. Maybe, we'll drill a first hole next weekend to put up our kitchen shelves - we know now where we want the olive oil to be...

Little by little, it will become our place.
We prefer to take it slowly...

Tuesday 3 May 2011

Bohemian style belt :: a tutorial

Bohemian style belt :: a tutorial

Have you noticed? This summer, it's all about belts. Belts are quick fixes to any outfit, be it chic or casual. This summer, they come in different styles, widths, textures, and colors... I particularly like tiny belts - they add elegance to any silhouette (read: suggest the presence of a waist, even if there ain't any...LOL).

I don't quite remember what exactly triggered this project - was it my new leather punch? - but I had it in mind for quite a while - I just hadn't found the time yet to work it out. But I did now! Hurray to all the cartons unpacked!!

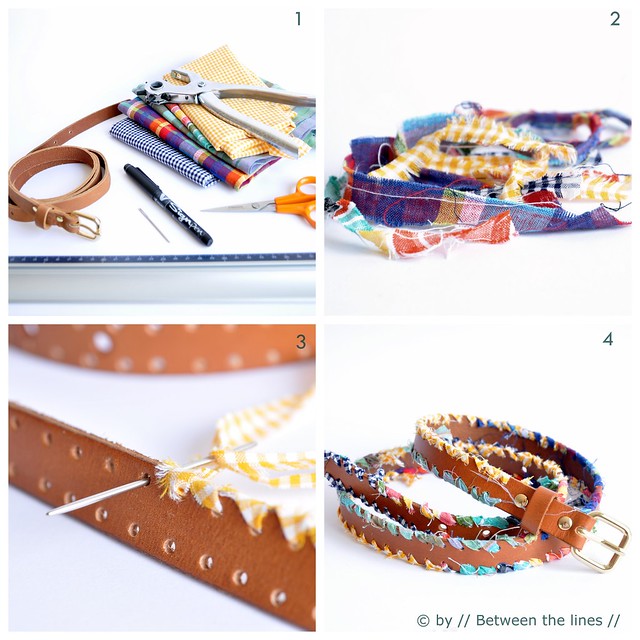
As always, this is a very easy project, which requires very basic sewing skills only. Also, very little is needed. Except for a free hour or so you'll need:

- an old leather belt, or a cheap new one
- fabric scraps, ribbon or bias tape,...
- a leather punch
- scissors
- big needle
- ruler and marker

Bohemian style belt :: a tutorial


Preparing the fabric:

From your fabric scraps, cut strips of different lengths. I cut mine about 1cm wide. No need to cut in bias - we like the frayed look on this project! I didn't measure the exact length the strips totaled up to, but my guess is you'll need about three times the length of your belt. If you're not sure, cut as you go.

Preparing the belt:

1. Determine how far apart you want the holes. I used 1cm intervals. Starting from the buckle, with a felt tip, make a mark every centimeter, about 0.5cm from the side. Do this all the way around the belt.

2. On your leather punch, determine which size of holes you want (use a piece of scrap leather or card board to test the sizes, before you start on the belt - the holes need to be big enough to fit the fabric strips through). Now, punch your way around the belt. This is the most and only labor intensive part of this craft, I promise!

Assembling:

1. Thread a big needle with the first fabric strip, tie a knot at the other end. Sew your way around the belt with a whip stitch through the holes. Change fabric strips as you go and to your liking. Don't worry about the lose ends - we will take care of those later - just start with a new strip in the next hole as you change.

2. Weave in the loose ends at the back of the belt, by slipping the needle under a couple of stitches. Cut off what's left. Repeat for every loose end and ...

Done!!
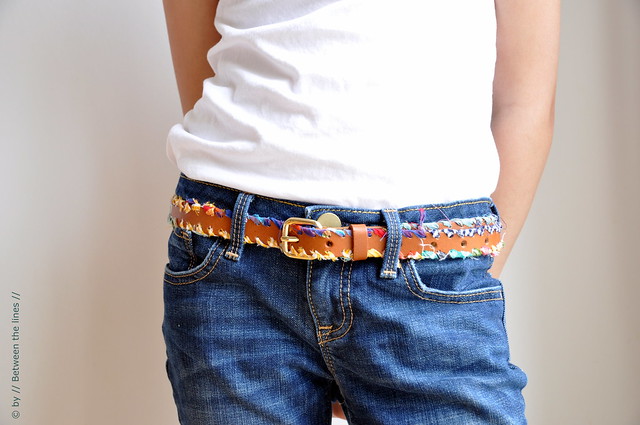
A bohemian style leather belt to give that white shirt and jeans outfit a little color boost!
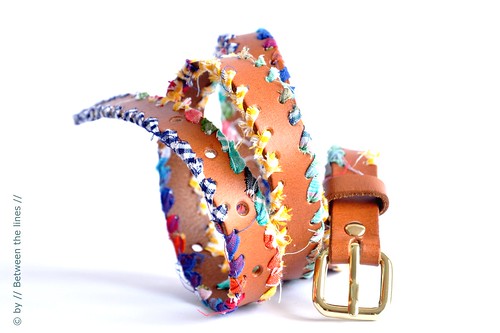
Bohemian style belt

Notes:

- If you don't have a leather punch, you can find them at most hardware stores, where they'll likely be cheaper than at specialty stores or craft stores.
- Instead of using fabric strips, one could also use different strands of embroidery floss of several colors combined together, leather shoe laces, raffia, ...
- I combined different types of fabric, but of course you could limit yourself to the use of a single color - in that case just cut your strips as long as possible.

Please note, this tutorial is intended for personal use only. Therefore, do not reproduce, sell or commercialize in any form. Thanks for understanding!

If you made something using a tutorial found on this blog or if you got inspired by something you found here, make sure to post your pictures here.
Sunday 1 May 2011

Saving the scraps

saving the scraps

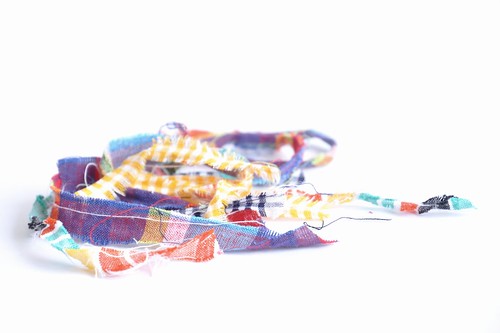
You know about my love for scraps by now.
And about my love for leather.
Well, there's a new tutorial in the making combining the two...

It will be up later this week...

Cheers,

P.