(from the archives) 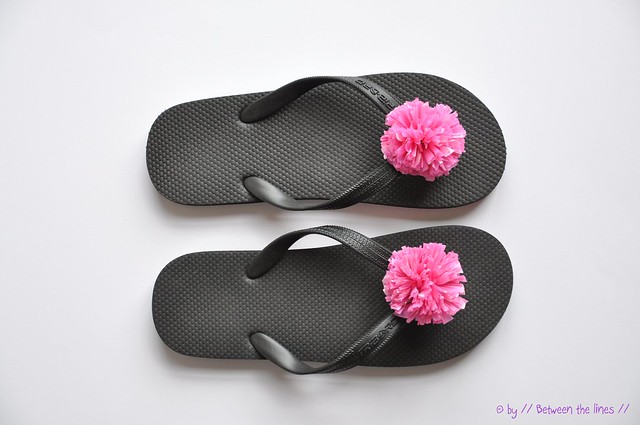
... or how to turn
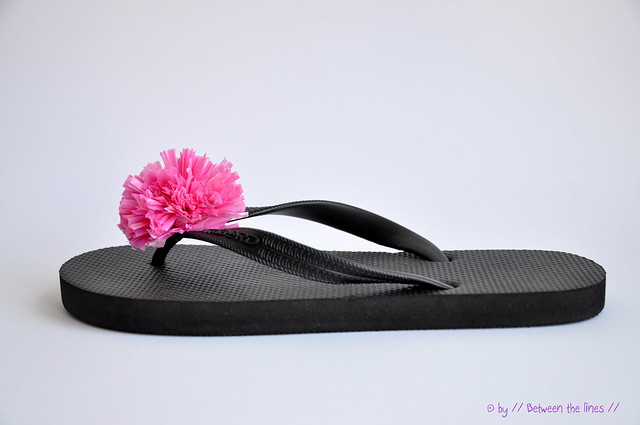
boring flip flop sandals into a pair of funky pompom slippers by recycling a couple of also boring plastic grocery bags. Summer is half way now, if you didn't get your flip-flops out yet, this is the right moment to do so!
This is a tutorial I wrote some time ago for the online magazine N.E.E.T (check out their June issue
here and check
here for back issues - the photography in this magazine is simply stunning as is the artwork, and they have a
blog too).
I'm posting it again, here, for those of you who missed it and also because I think it's a fun recycling project which you might want to try making with the older child - if you are having summer vacation right now and if you are running out of ideas: Keep on reading!
What you’ll need:
Warning: Choking hazard! Small parts. These flip flops are not suited for young children!
- A pair of plastic flip flop sandals- A couple of plastic grocery bags - A piece of card board- Pencil- Scissors- Needle and thread- A glass and a coin or a compass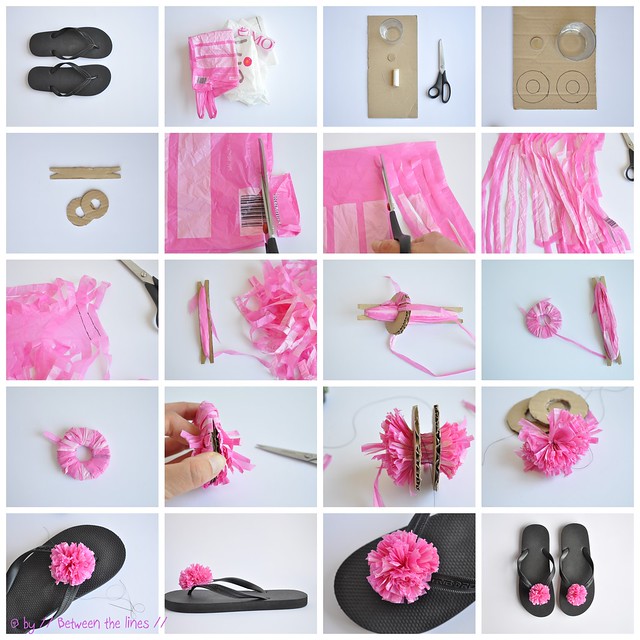
Instructions:
1. Pompom template: Make two card board doughnut shaped circles using the glass and coin for tracing. Cut out both circles; next cut out the center. 2. Card board spool: Cut a rectangular piece of card board, the width being slightly less than the diameter of the smallest circle – make a triangular incision at both ends.3. Plastic bag string:a. Place the plastic bag in front of you, flat. Cut off the bottom seam of the bag and unfold the inner folds. Place the bag which is still tubular flat in front of you.
b. Start cutting strips going from one fold to the other but leaving a one inch allowance at the top fold. Repeat this over the entire width of the bag until you reach the handles. Cut off handles.
c. Now, unfold the allowance and slip the bag over your hand with the allowance facing up. Now, start making slant incisions from strip 1 to strip 2, strip 2 to 3 etc. You’ll get one long strip of plastic bag string.
d. Wind the plastic bag string around the cardboard spool you made.
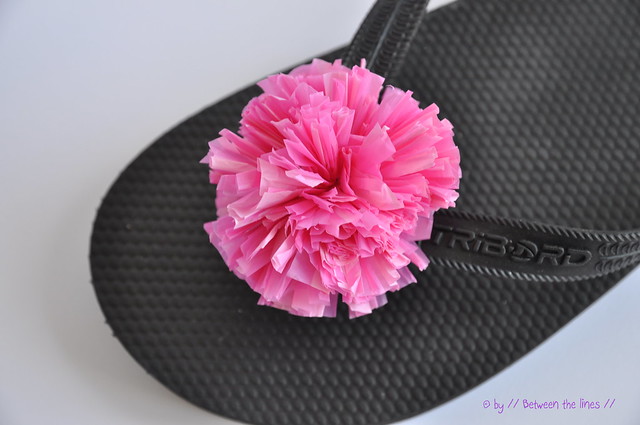
4. Plastic bag pompoms: a. Place both pompom templates on top of each other. Using the spool wind the string around the pompom template. Make sure to cover the entire template. The more string you wrap around the template the fuller the pompom.
b. When finished, carefully cut open at the top between circles. Carefully separate the circles slightly so you can wind some thread firmly around the strips. Tie a few knots. Don’t cut off the loose ends.
c. Carefully, slip off the template. If necessary trim the pompom to give it a nice shape.
5. Assembling: Place the pompom on top of the strap of your flip flop. Slip the loose ends of the thread through a needle. Now wrap the thread around the strap and, pass the needle through the center of the pompom. Repeat a couple of times until the flower is firmly attached. Tie a firm knot; cut off and apply a dash of glue or transparent nail polish to the knot. Trim the pompom some more if necessary. Repeat for the other foot and… Done!Note: If you don't have enough bags of the same color ( you need approx.1 per pompom) use different colored bags and combine them on the spool.
Warning: Choking hazard! These flip flops are not suited for young children!
As with all of my tutorials, please note, this tutorial is intended for personal use only. Therefore, do not reproduce, sell or commercialize in any form without permission. Thanks for understanding!
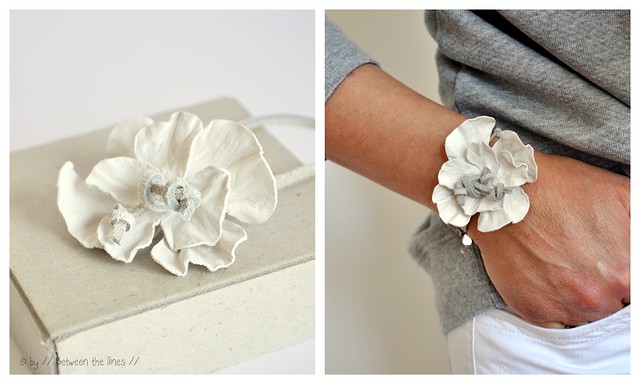 I don't know what took me so long to post this. Maybe the fact that this was a craft totally gone wrong at first. It's the same flower as the ones here and here. Only, the leather was of such poor quality that it looked horrendous. Since it couldn't get any worse I decided to wet the leather and shape it (read: wrinkle it, roll it, twist it, ...) and the result you can see. Not the best I've made so far, but it was nice to actually see you can shape leather with just a bit of water (and a lot of patience for it to dry). Next, all I did was threading it onto a leather shoe lace I still had sitting around and that's it!